I recently attended the Vancouver Spa Show. While browsing through the makeup brushes a woman approached me and had no idea what any of the brushes were for. While telling her about the brush she originally picked up, she constantly grabbed more and more asking me what all the brushes were for. As I was explaining, I noticed multiple people were listening in and thought to myself, how do these people not know? This is the place for professionals and they weren’t even educated in the brushes available! So why not let you all know.
I’m going to offer a selection of brushes that I have, then you can go from there. Lets start with facial brushes.
The dome brush; used for facial powder application. Always apply facial powder in a downward motion as the vellus hair on the face will catch the powder and look caked if the application is incorrect.
Powder Brush; used for blush application.Always apply blush in an upwards direction. Do short upward sweeps from the cheek up to the ear, but start up closer to the ear. It’s a little bit harder when you start out but you get used to it. Another version of the powder is slanted, which also works very well for blush. A third version of the blush brush is the fan brush, however this is my least favorite brush for blush application.
The loose powder brush has a few different uses. Of course it’s used for powder application, however it can also be used for a quick sweep of bronzer over the whole face.
Oh the Jane Iredale flocked sponge. One of my personal favorites. Made with no latex so it’s hypoallergenic, how fun! This is my favorite tool because it’s diverse. The flock sponge is first of all your mini eraser for all those little tiny eye-makeup mistakes. Secondly, it offers insane coverage. Use to dab powder or liquid foundation to the skin for a heavier coverage.
I’m putting this in face because a bigger version of the camouflage brush is used for liquid foundation. As I don’t use liquid foundation I don’t require one and do not have one.
Now onto eye brushes.
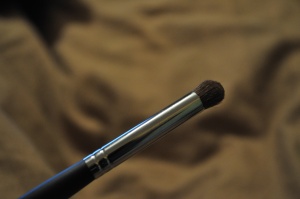
The mini dome brush is used best for your base shadow color or colors that will be applied to a larger portion of the eye area. It also allows simple blending.
The precision puff is well used for work in the crease of the eye or precise areas. This brush works well to create more solid edges to the shadow.
I’m not positive what you’d call this brush, however for me this is a classic eye shadow brush. it works well to create an easy sweep across the lid to do your blending or application of your middle toned colors.
The angle brush is perfect for application of eyeliner that doesn’t come in a stick form. Make sure to always lead with the shorter side. To create a more natural liner look, dab the liner on instead of streaking it.
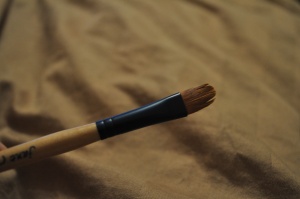
With this brush the name kinda says it all. Use the concealer brush to apply concealer to the under eye area or over blemishes.
Again, this brush is relatively straight forward. The brush side is for taming brows, where as the comb side helps to relieve clumping in the eyelashes after mascara application.
Lastly, the brush for lip application.
This is, yet again, another straight forward brush. apply lipstick or gloss with the deluxe lip brush. this will create a smooth appearance, allow you to blend the color with the lip liner (if lip liner is applied) and will allow a clean application from the lip stick.
I’m going to quickly touch on how to clean your brushes as well. Firstly, if you have a light bristled brush such as my fan brush, clean it in cold water to avoid staining the bristles. Wash all your brushes with a nice shampoo in cool water, and leave to dry. Before setting them to dry, try and organize the bristles so that they are in the right positions so that the bristles don’t fray. Leave the brushes to dry so that they are on an angle and the bristles are downward (lay a towel down and roll up a part of it so that it is holding the handle part of the brush higher than the bristles). This will let the water drip off the bristles onto the towel rather than deeply into the furrow which could cause the furrow to detach from the handle, or cause the bristles to fray.
Give your brushes a lot of love, they can last you a very long time! Hope this helps!
xoxo
Jdal.


Well I’m glad that my use of brushes as been more or less on par with what you have outlined! Are there any distinguishing benefits to the fan brush? (I prefer the slanted blush brush, personally, but I have used the fan paint brush quite a bit when painting, so I’m wondering if it produces the same angelic/fluffy coverage) Also, how do you feel about the Kabuki brush? I’m hesitant to use it because I like to have more control with a handle but I didn’t know if professionals favor it or not.
The fan brush is not a favorite of mine, I find that it takes a while to get any coverage at all, and when it does give coverage it’s in an awkward amount of space: either too thin of a line or too wide of an area. I haven’t really found anyone else to really love the fan brush, however different things for different people I suppose.
The Kabuki brush was one of my favorites for a long time, and I’m kicking my butt that I didn’t put it in here! (it’s tucked away in my backup makeup kit) I find the kabuki to be fun, I love it it’s just so adorable. But I find I have the habit of dabbing with that brush which makes the powder look caked. So you just have to be careful to do downward strokes or circular motions with the kabuki so that you get even coverage and don’t get that caked look. I think I’m going to write something about kabuki brushes just because I left it out and feel bad about him ;]
Thanks for reading!!!!
Pingback: Spring into Beauty: Day Two; Detox your Makeup Bag « jdalbeauty